For what feels like forever, GIMP has been the top dog when it comes to photo editing that is free and free to use.

A resemblance to commercially available programs is probably due less to coincidence than to the fact that a standard is used here. Nothing entirely unusual in the world of free software, which is often just clones and only gradually goes its own way.
But does that make the software bad? Not at all.
We’ll tackle some simple tasks and see how GIMP does. We use the pre-release version of GIMP 3 so that the interface looks the same as it will look in the future.
Removing a cable
First, let’s do something fairly standard – remove a cable.
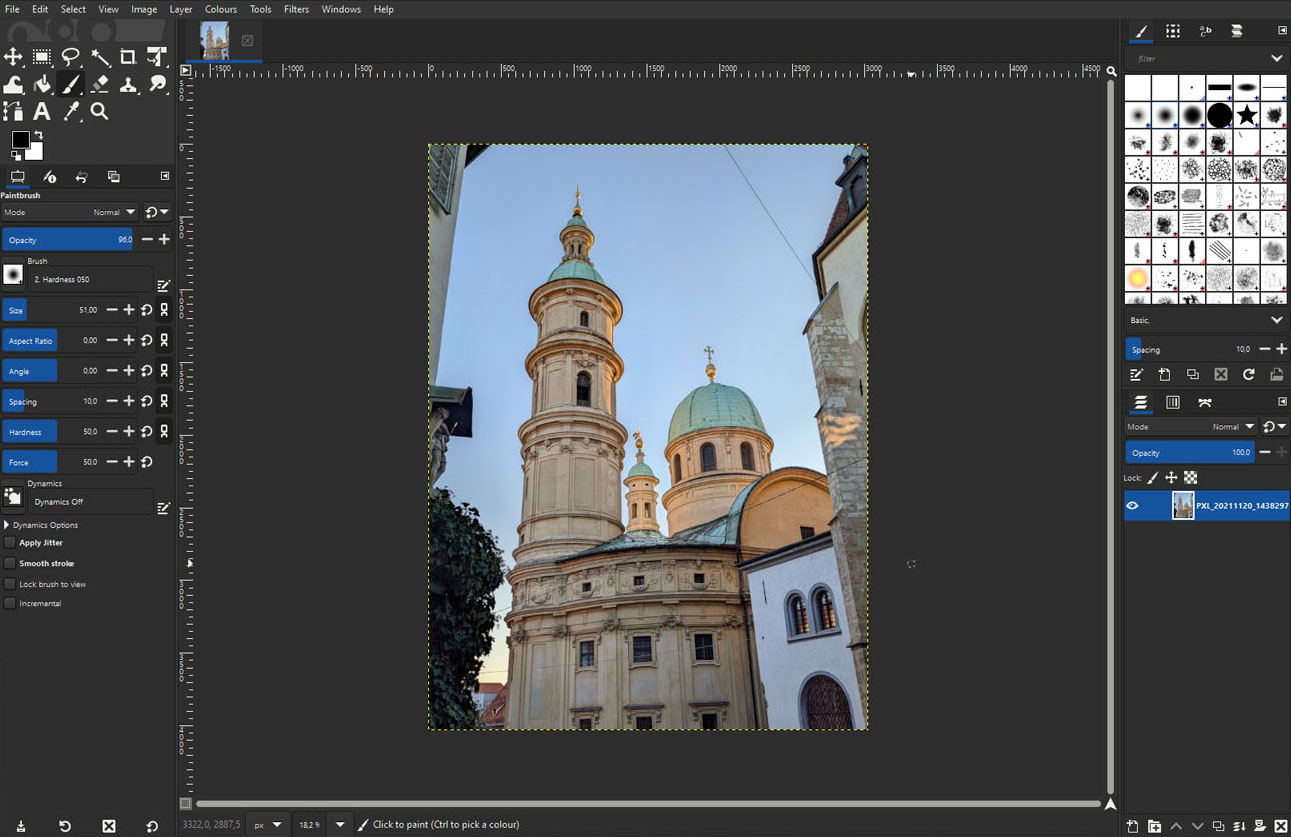
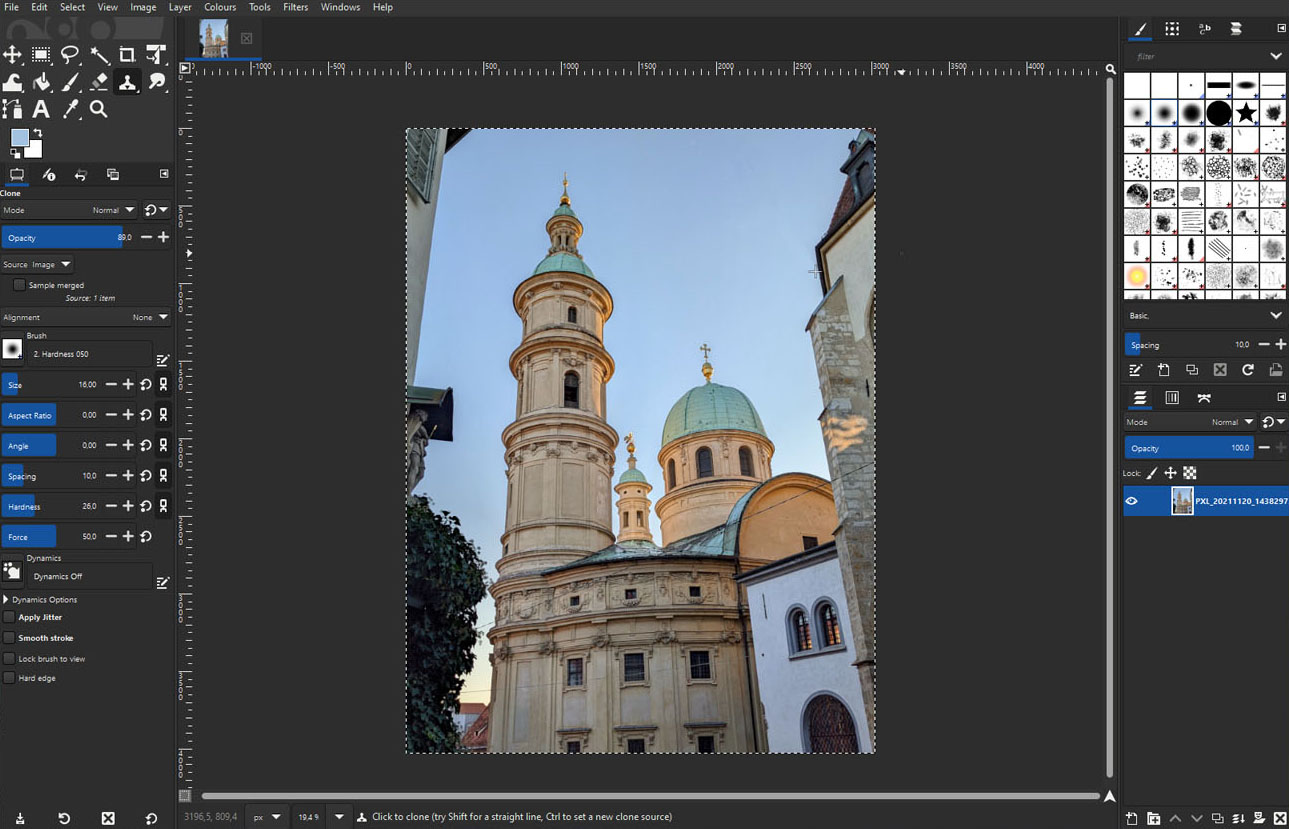
In the original photo there is a cable in the sky, this is a little easier to remove than the cables that go across. I choose to use the copy tool so you can just select an area to use as a base and then copy that base to a new location. So like a copy. You can find it in the toolsset on the left site, second row.
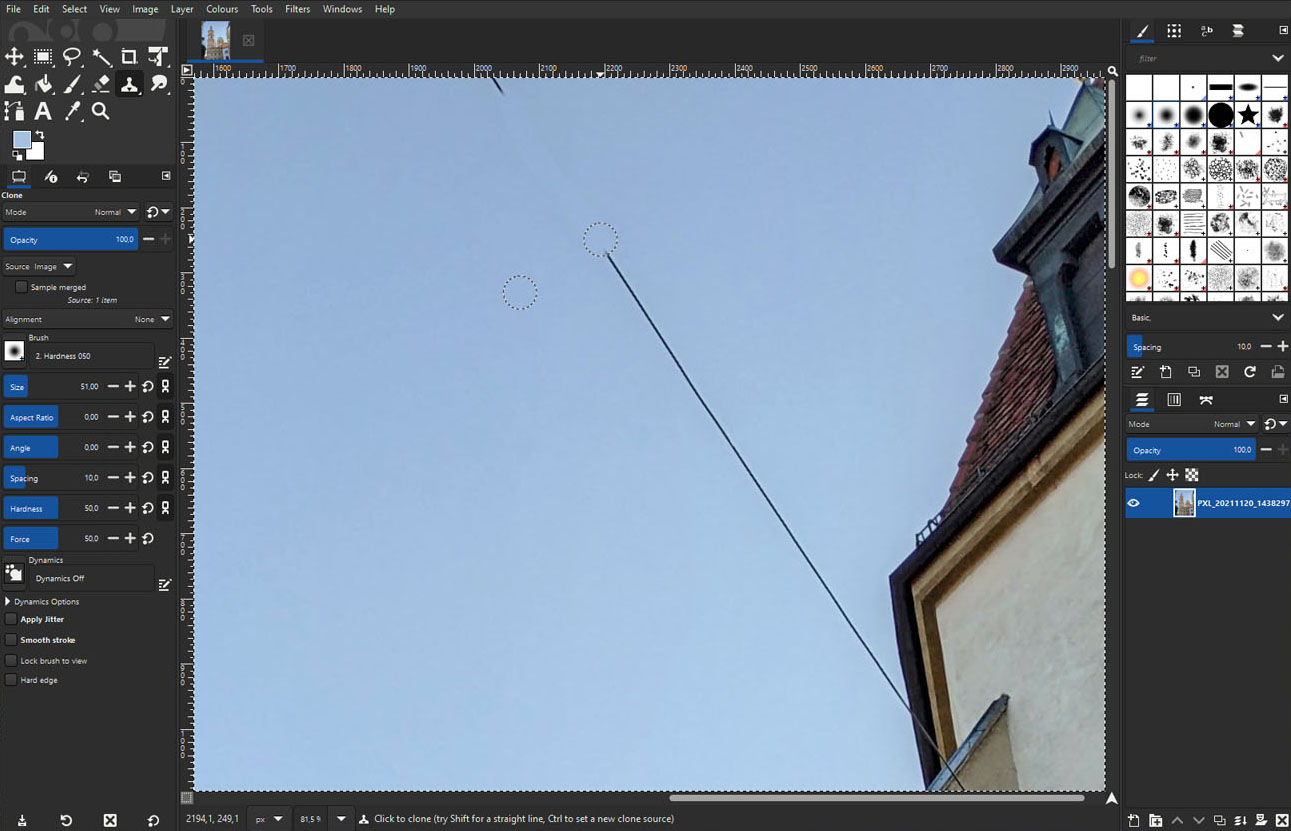
You maybe have to change the size of the tool, but in the end the cable is gone. You have to work a lot more carefully on the wall, but if you don’t overdo it to infinity, then it’s not a problem and, especially with a sky like this, it’s done quickly.
Touch up picture
A photo that was taken in the evening, the sky is still nice and blue, the tree next to it is also green where the sun hits it – but the house is drowning a bit and is also becoming increasingly bluish, although that is actually the most important thing in the photo.
To start with, I’ll correct the color temperature. To do this, you can open the “Color temperature” under “Colors” and adjust it accordingly:
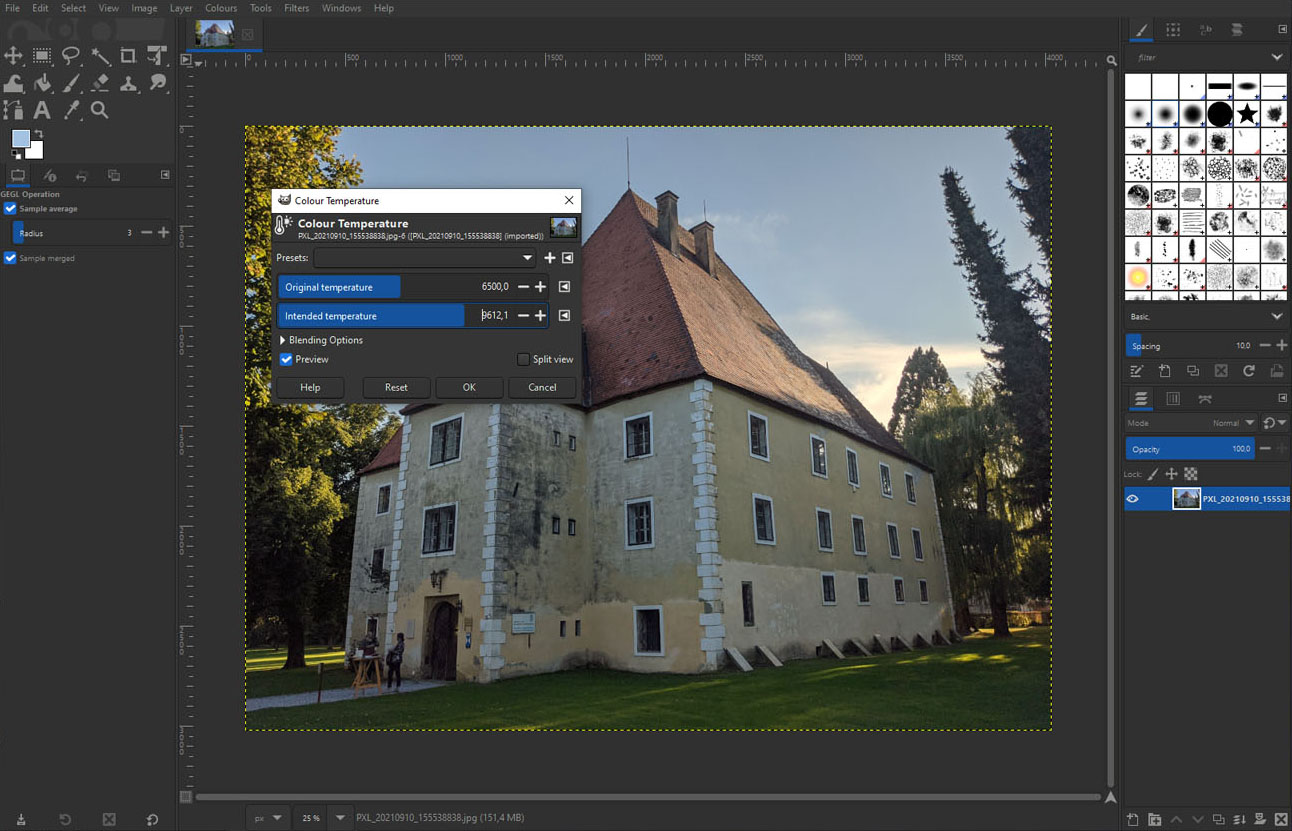
This gives you a much warmer image, even if the sky continues to turn less blue, but at least we now have the house in a color that comes closer to the original. Temperature is primarily understood as the shift of colors in blue and orange. Color correction therefore primarily refers to the creation of the image as seen in real life – at least as far as the colors are concerned.
After that I want to raise the shadows a bit, so everything looks brighter:
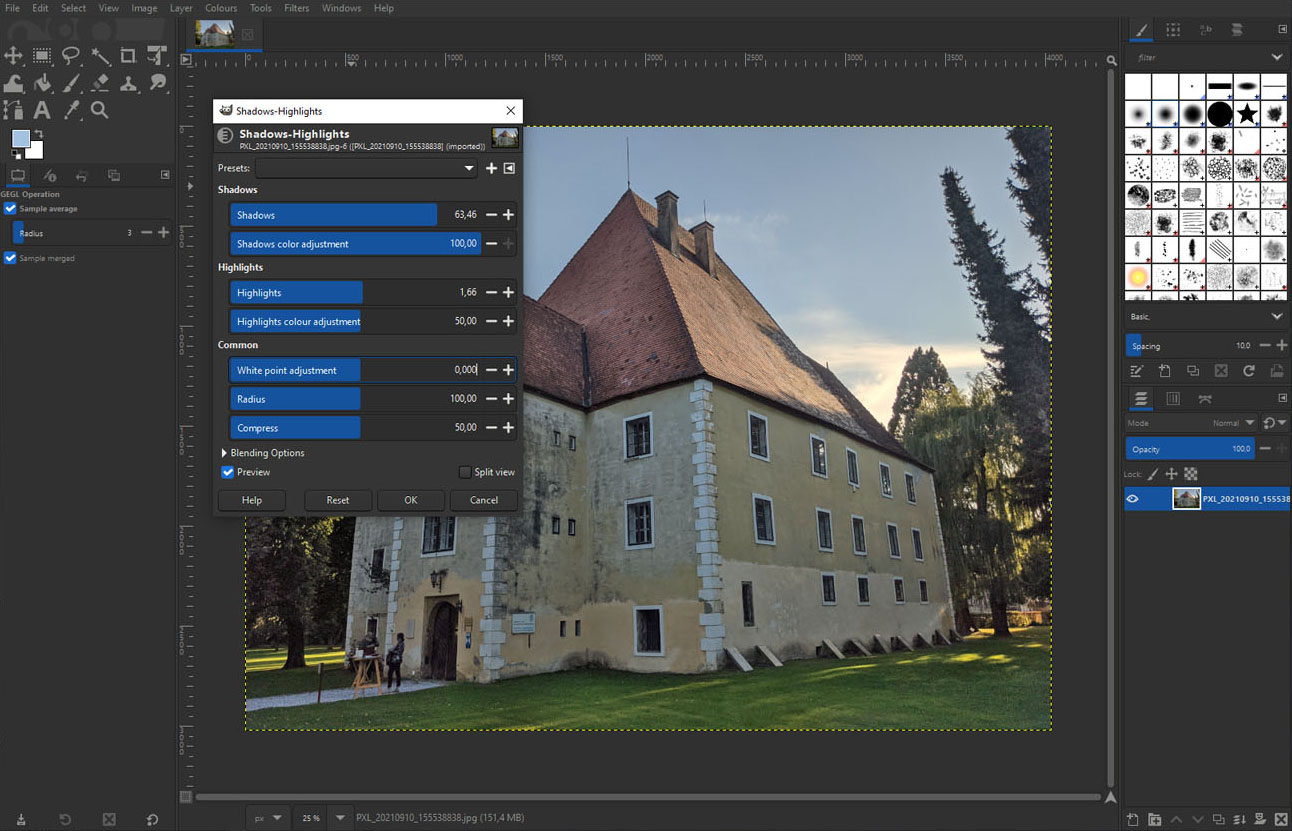
These can also be found under “Colors” and “Shadow-Highlights”. You can sometimes try to pull down the highlights, but that’s not necessary in this case. You notice that it also looks a bit like HDR because you change the range of light.
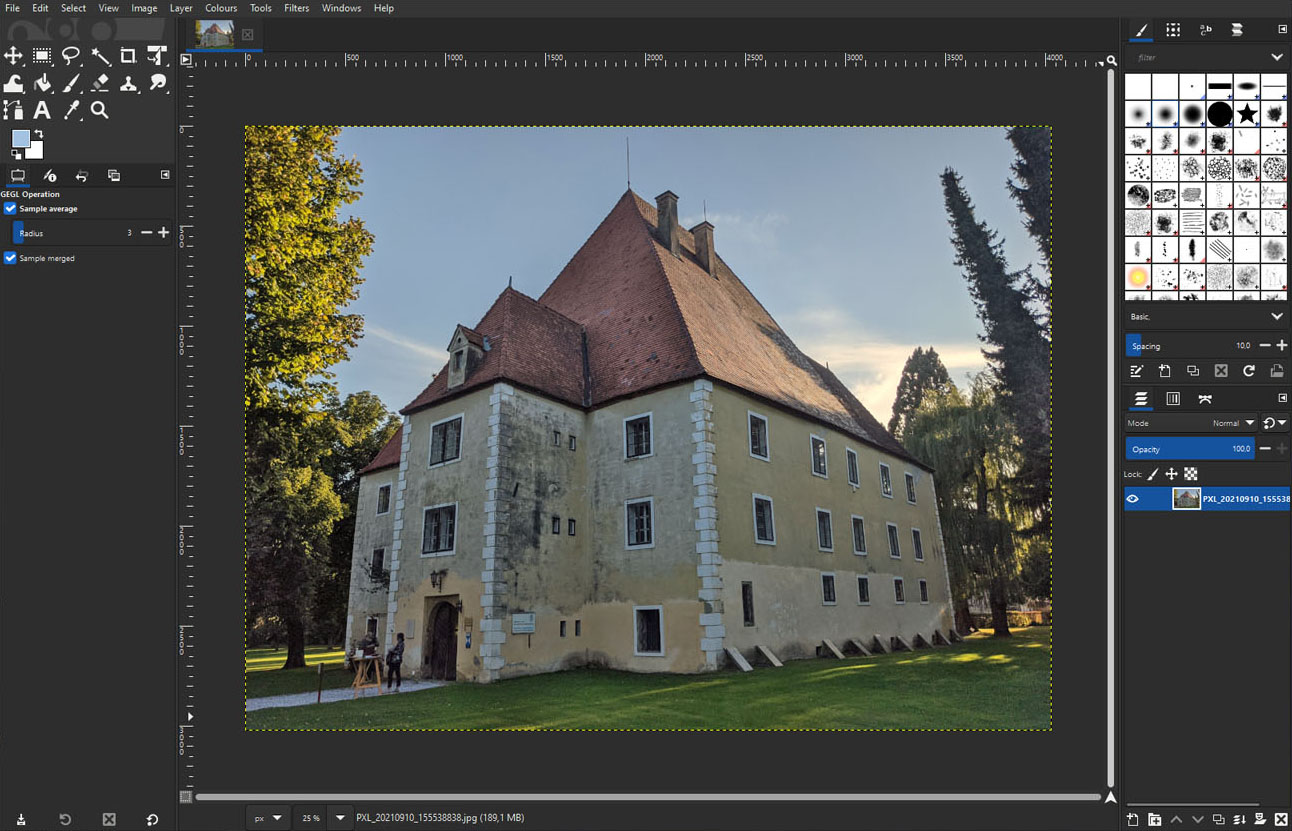
After just a few minutes you have a picture that looks friendlier and brighter. Of course one shouldn’t exaggerate here, but it is often better to make improvements here than to accept a cool and dark picture.
Rotate and crop an image
Now we want to straighten one more image and then crop it.
For this we first use the “Rotate” tool, which is located on the left in the toolbox – several tools are hidden here, click on them with the mouse for a longer time and you can see which tools are available.
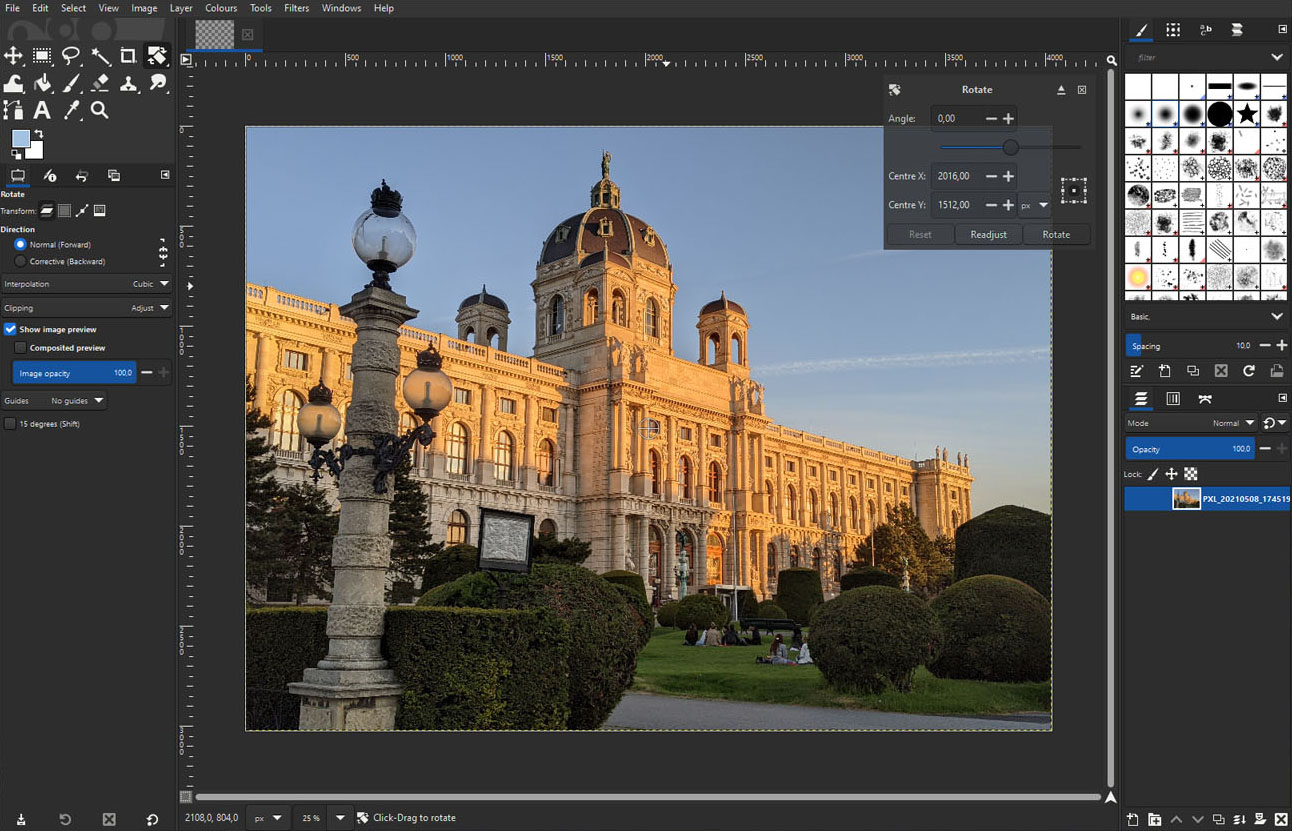
So you click in the middle of the picture and you can start rotating. But how do I know if I’m straight?
Luckily, to the left of the rulers right next to the image, you can draw straight lines into the image with a mouse click and drag – to the desired positions.
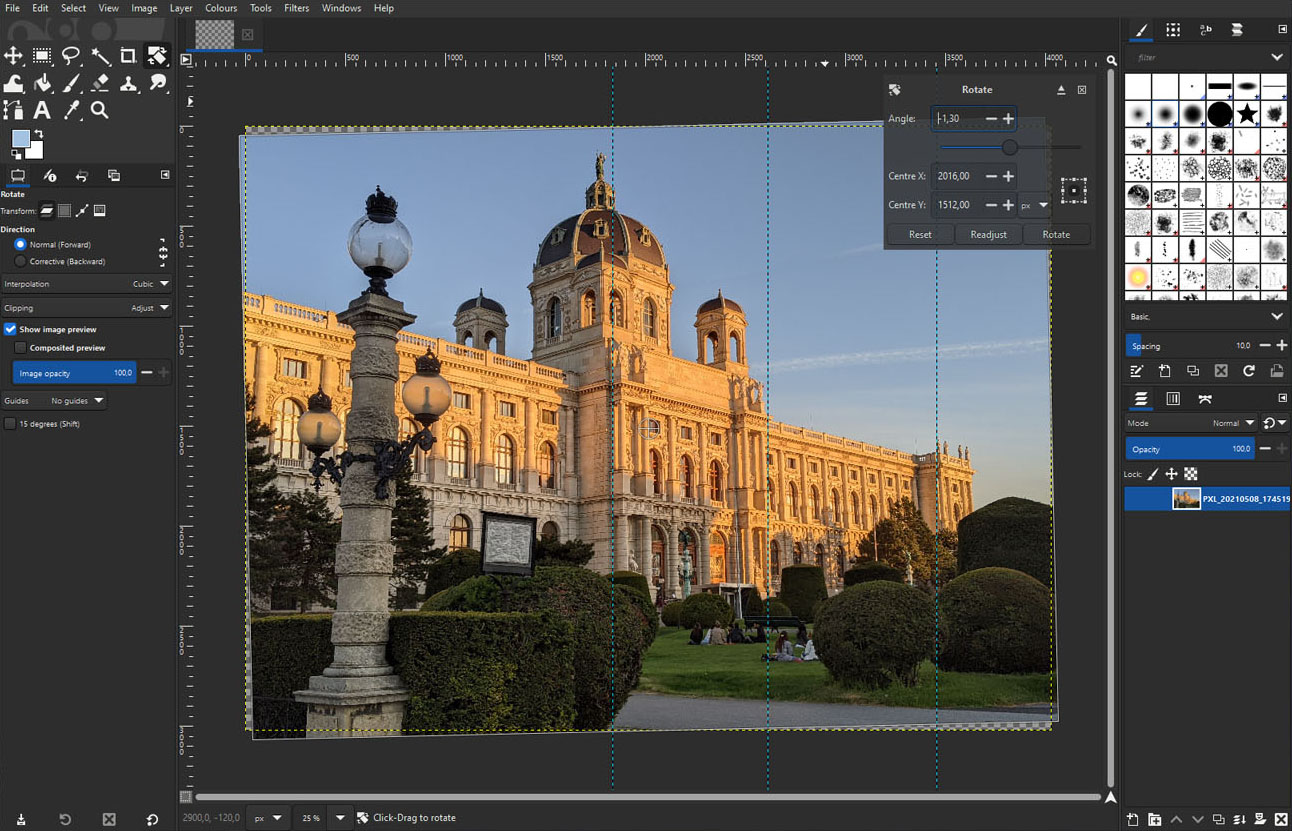
This makes it easy to see what is going on and work accordingly. You can remove the lines again by clicking and sliding them out of the picture. You can now see that the picture is partly black at the corners – because there is no longer any picture after the rotation. That’s why we still have to crop.
Here again there is a separate tool in the top left toolset, “Crop”. In this case, I also selected “Fixed Aspect Ratio” in the middle left in the program, then the picture remains in the appropriate proportions.
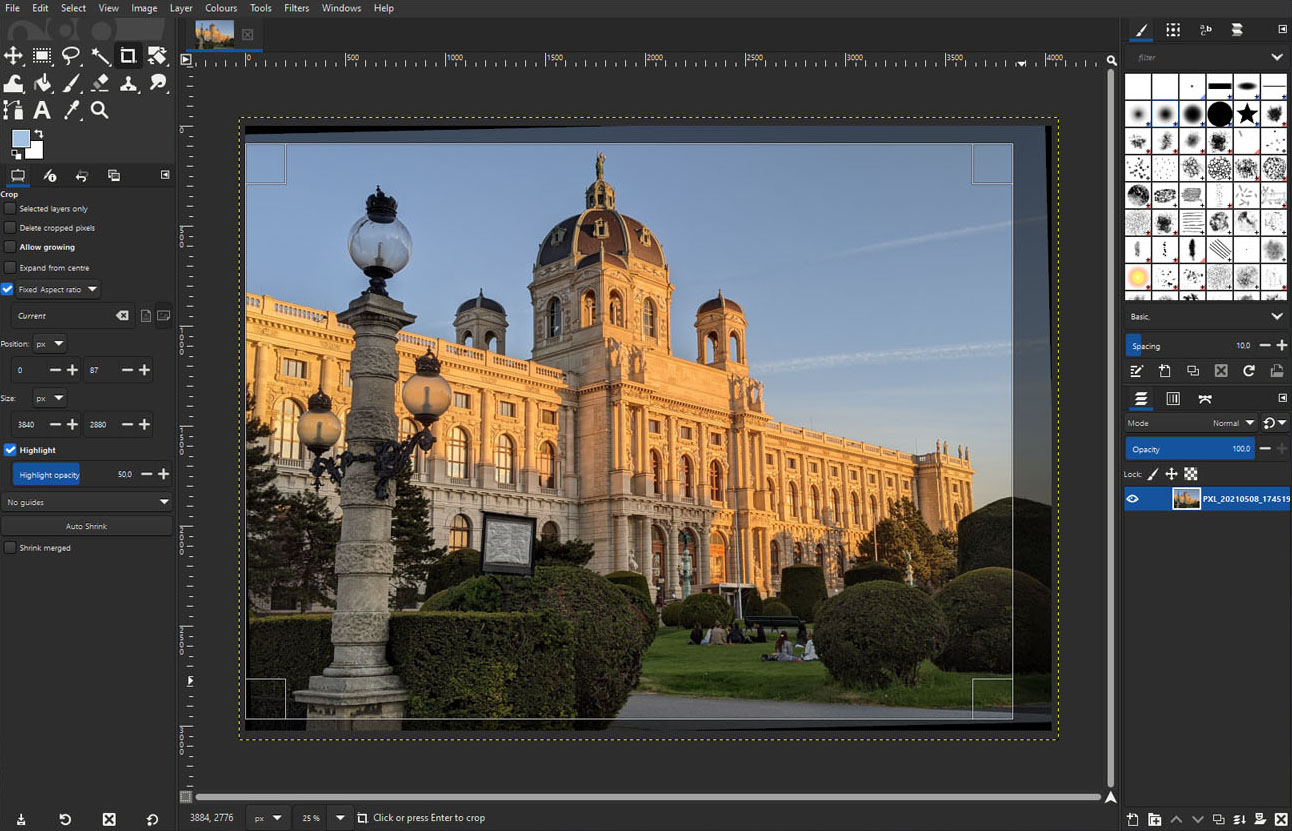
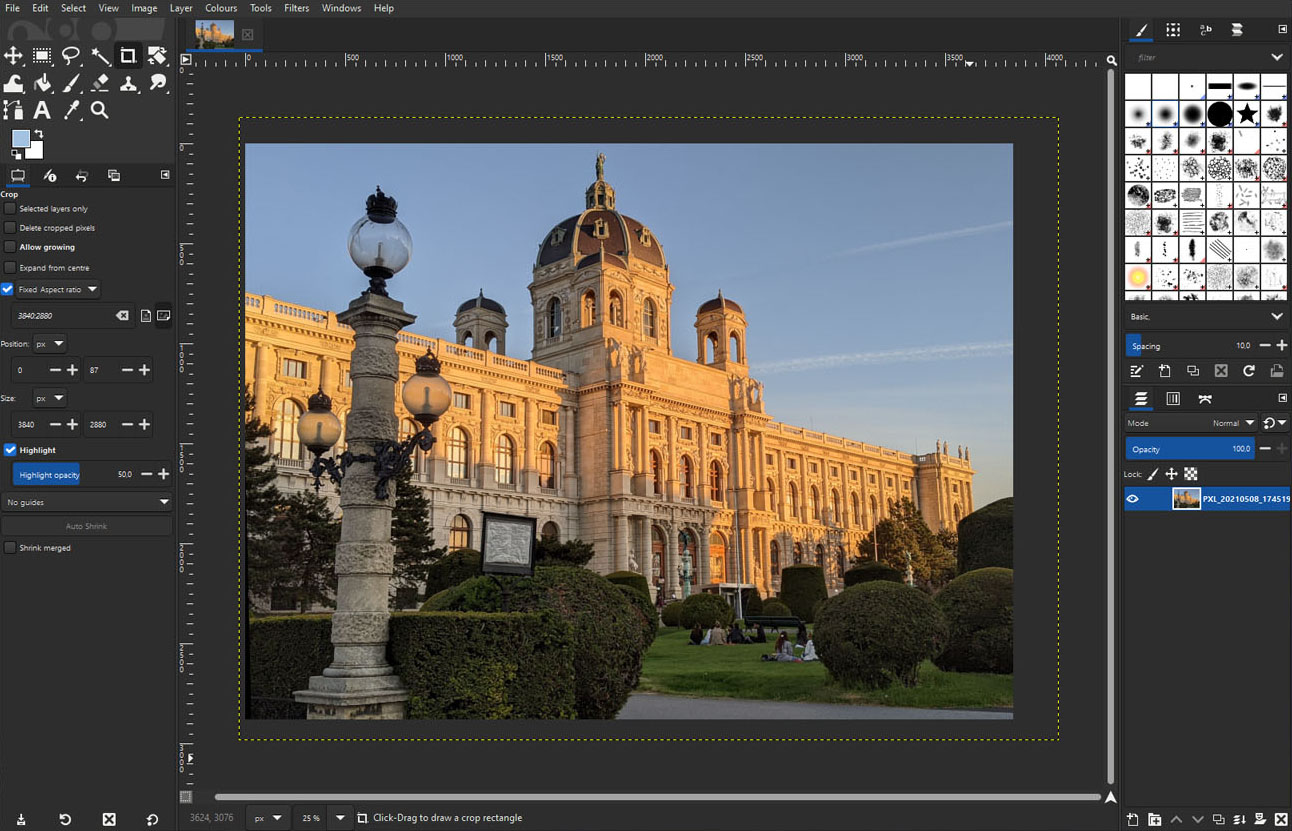
Now drag the frame as desired, then click in one of the squares at the corners to crop it.
The picture is already done!
More functions
Of course, GIMP can do a lot more, but it takes more time and tutorials, which can also be found on YouTube as an example. Here we just wanted to give a quick overview of how to do very basic things.
Have fun diving in and discovering!